Blog

  • Peloton vs Echelon Bike 2026: An Honest Trainer’s Take

    Peloton vs Echelon Bike 2026: An Honest Trainer’s Take

    Picture this. You’re standing in a sporting goods store or scrolling at 11pm, trying to decide between a $1,500 bike and a $900 bike. Both have screens. Both have instructors. Both are going to sit in your living room for the next several years.

    Which one actually matters? And more specifically — is Peloton worth the extra $600, or is Echelon giving you 90% of the experience at 60% of the price?

    I’ve had clients with both. Here’s what they told me — and what I observed.

    Quick verdict

    Peloton is the better product. That’s just the truth. The hardware is more refined, the content library is larger and consistently higher quality, the instructors are better, and the community is more active.

    Echelon is the smarter purchase for a specific type of person — one who isn’t sure how committed they are to indoor cycling long-term, needs to keep the budget realistic, and won’t deeply miss the Peloton-specific class experience.

    The decision you’re really making isn’t Peloton vs Echelon. It’s: how seriously am I going to use this?

    The full cost picture

    Neither of these bikes has a simple price. Both have subscriptions attached. Here’s what you’re actually committing to:

    CostPeloton BikeEchelon EX-5S
    Upfront (bike)~$1,445~$999
    Monthly subscription$44/month (All-Access)$35/month (Premier)
    Year 1 total~$1,973~$1,419
    Year 3 total~$3,029~$2,259

    By year three, Peloton costs about $770 more. Over five years, you’re looking at a ~$1,300 gap. Whether that gap is meaningful depends entirely on whether you’ll actually use it enough to care about the quality difference.

    One thing to know about Echelon’s subscription: without it, the bike is essentially a piece of exercise equipment with a screen that shows nothing useful. The same is true for Peloton, to be fair. But Echelon’s free content options are more limited — you’re more dependent on the subscription to get real value from the bike. Read the three-bike smart bike comparison if you want to see how Bowflex fits into this picture too.

    Hardware and ride quality

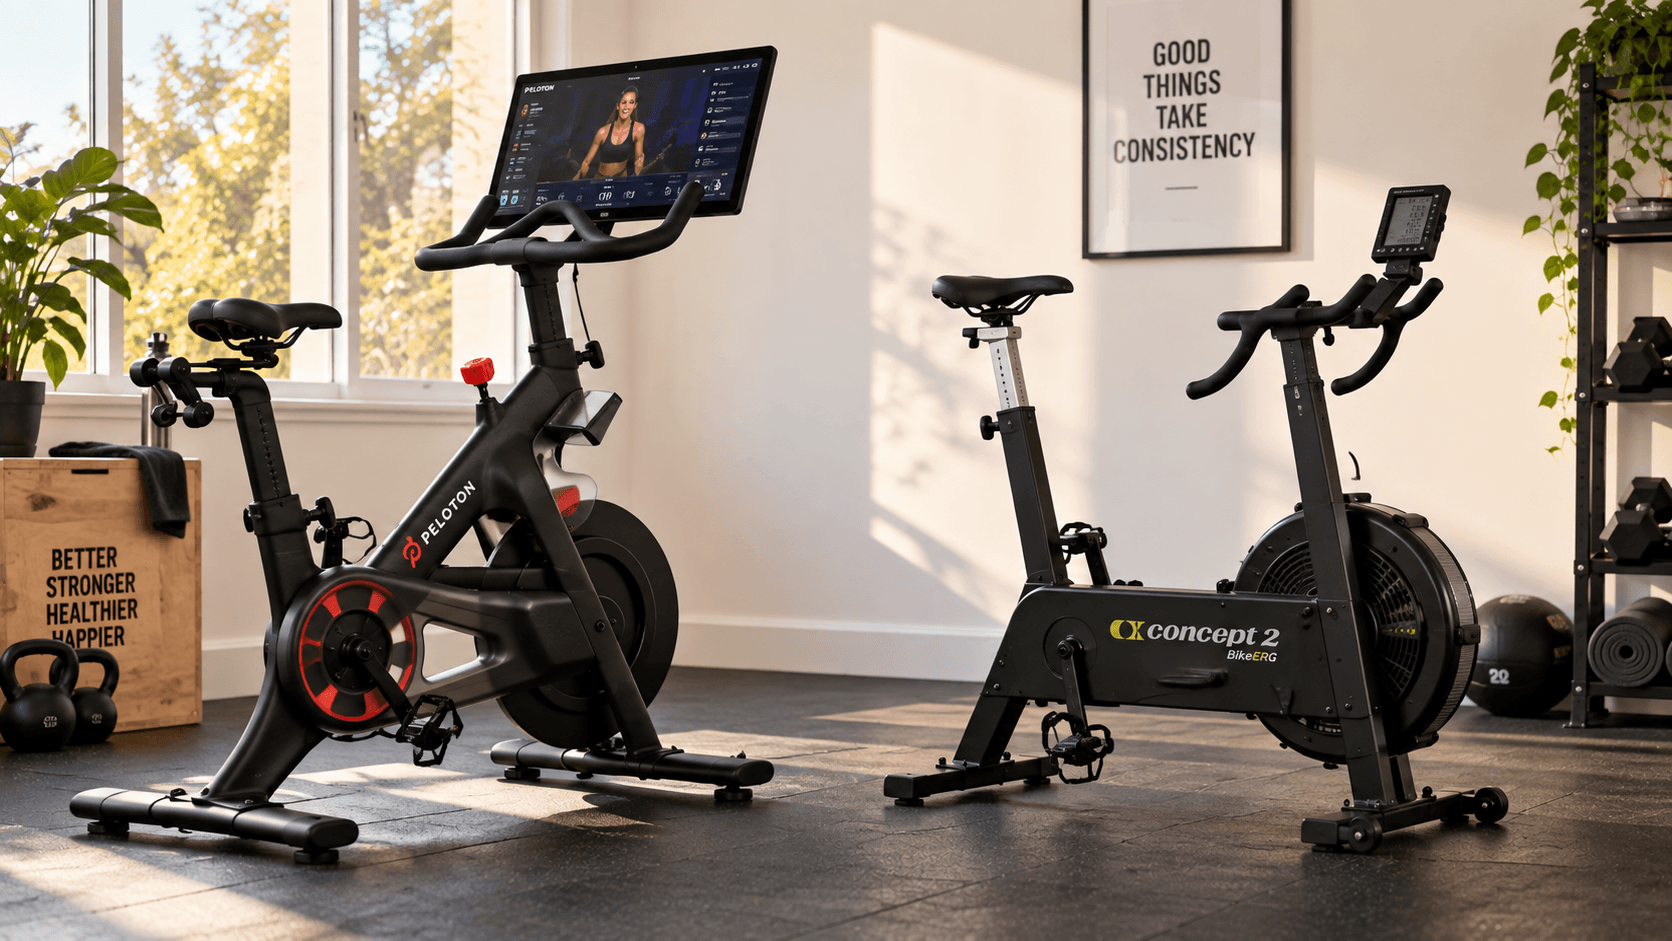
    This is where the price difference is most visible. Peloton’s frame is heavier and more solid underfoot. The resistance adjustment is smooth and precise. The touchscreen is bright, responsive, and large enough to genuinely function as a coaching tool.

    Echelon is good. For the price, it’s legitimately good. The resistance works, the screen is functional, and the ride is comfortable. But there’s a difference between “this works fine” and “this feels like it was built to last ten years.” Peloton feels like the latter. Echelon feels like the former.

    The specific thing clients mention most about Peloton: the pedal response during high-cadence work. At 100+ RPM, you notice whether a flywheel has good balance or not. Peloton’s does. Echelon’s is decent but not at the same standard.

    If you’re doing low-to-moderate intensity rides for general fitness, you probably won’t notice the difference. If you’re taking performance classes and pushing cadence, you might.

    Classes and content

    Peloton’s content library is genuinely one of its strongest advantages. Over 50,000 classes across cycling, strength, yoga, meditation, running, and more. The instructors are specifically trained to deliver high-energy, technically informed classes — it’s the closest a home product gets to boutique fitness studio quality.

    Echelon has thousands of classes too, and their live schedule has improved. For pure cycling content, it’s sufficient. The gap shows more in the depth of cross-training content and the quality of individual instructor delivery. Peloton instructors feel like they’ve been heavily selected and coached. Echelon instructors feel more like good group fitness instructors, which they are.

    Neither of these facts makes Echelon bad. It makes Echelon a different product targeting a different level of engagement.

    Who should buy which

    Buy Peloton if: You’re certain you’ll use it 4–5 times per week. The class experience matters to you — you want great instructors, high production quality, and a community leaderboard that means something. You’re happy paying for premium over the long term.

    Buy Echelon if: You want a solid indoor bike experience without the Peloton price commitment. You’re newer to indoor cycling and not sure how hooked you’ll get. Budget is a genuine constraint. Or you just don’t care about the content quality gap and want a bike that functions reliably.

    One more consideration: resale value. Peloton bikes hold value well on the secondary market. If you buy one and decide it’s not for you in 18 months, you can sell it for 60–70% of what you paid. Echelon’s resale market is thinner.

    Worth considering instead

    If budget is the driver: a basic spin bike ($200–$400) with a free YouTube cycling class gets you the cardiovascular benefit at a fraction of the cost. The experience isn’t the same, but for general fitness it works.

    If you want cardio but not necessarily cycling: the spin bike vs rowing machine comparison is worth reading — rowing gives you a full-body cardiovascular workout that cycling doesn’t, and good rowers are available at comparable price points.

    For a broader view of your cardio options: treadmill vs stationary bike for weight loss covers the most common decision people face before landing on a bike specifically.

    FAQ

    Is Peloton worth the money compared to Echelon?

    For serious users who ride 4–5 times per week and value the class experience, yes. The hardware is superior, the content library is larger, and the instructor quality is genuinely better. For casual users who mainly want a functional exercise bike, the premium isn’t worth it — Echelon delivers adequate performance at meaningfully lower cost.

    Can you use an Echelon bike without the subscription?

    Technically yes, but practically no. Without the Premier subscription you lose access to live and on-demand classes, which is the main point of the bike. Free mode gives you basic metrics only. Budget the $35/month into your total cost calculation from day one.

    How long do Peloton and Echelon bikes last?

    Peloton bikes, when maintained, typically last 7–10+ years. Echelon’s build quality suggests a 5–7 year lifespan with regular use. The software and subscription model is the bigger long-term variable for both — whether the platform remains supported and the content stays fresh matters as much as the hardware durability.
  • Best Adjustable Dumbbells for Home Gym 2026: Honest Picks From a Trainer

    Best Adjustable Dumbbells for Home Gym 2026: Honest Picks From a Trainer

    Spend $100 on the wrong adjustable dumbbells and you’ll know it within three months. The mechanism sticks. The weight increments don’t match how you actually train. Or they feel so awkward in your hand that you quietly stop using them and the guilt of seeing them every time you walk past starts to feel familiar.

    I’ve been through this loop with clients. Someone excited about their new setup, specific product picked from a YouTube review, and six weeks later they’re asking me if they should return it. So I started paying closer attention — not just to which dumbbells are technically impressive on spec sheets, but which ones people actually use consistently, month after month.

    That’s the only metric I care about. Here’s what I found.

    What actually matters when buying adjustable dumbbells

    Before the product list, a few specs that actually separate good sets from ones you’ll regret.

    Weight ceiling. Most people underestimate how quickly they’ll outgrow lighter sets. If you’re a complete beginner, 52 lbs per hand sounds like plenty — and it is, for now. But goblet squats and Romanian deadlifts progress faster than upper body isolation work. In 12–18 months of consistent training, you may find yourself needing more for lower body movements specifically. Sets that top out at 52 lbs are fine for most. If you already train regularly, look for 70 lbs minimum or expandable systems.

    Adjustment speed. This sounds minor until you’re doing supersets or circuits where you need to switch weights between exercises. Dial systems take 3–5 seconds. Pin systems take 2–3 seconds. Quick-lock systems take 10–15 seconds but offer more security. None of these times are dealbreakers on their own — it’s the frustration at rep 50 of a circuit that accumulates.

    Handle feel. Knurling, diameter, grip texture — these are personal. What I’d say is that any handle that feels awkward on day one will feel annoying by week four. If you can get to a store to hold a set before buying, do it.

    The drop rule. Almost every adjustable dumbbell system void its warranty if you drop the weights. This isn’t fine print — it’s a real usage constraint. If your training style involves sets to muscular failure where you might need to drop a dumbbell mid-rep, adjustable systems have a genuine limitation you need to account for.

    Top picks for 2026

    1. Bowflex SelectTech 552 — Best overall

    The 552 has been the benchmark for dial-select adjustable dumbbells for years. It adjusts from 5 to 52.5 lbs in increments of 2.5 lbs (up to 25 lbs) then 5 lbs above that. Two dials — one on each end — click to your chosen weight as you rotate them. Takes about four seconds per hand. Then you lift the dumbbell out of the cradle and you’re done.

    What keeps the Bowflex relevant despite competitors: the weight increments are genuinely useful at the lighter end. That 2.5 lb jump from 22.5 to 25 lbs matters for shoulder isolation work where jumping 5 lbs is often too much of a leap. The dumbbell also feels relatively normal in the hand — it has a shape that resembles a standard dumbbell more than most adjustable systems do.

    The limitation: 52.5 lbs per hand. For most intermediate home gym trainees doing goblet squats and deadlifts, this becomes a ceiling within 1–2 years of consistent training. The fix is either accepting it, or budgeting for the SelectTech 1090 (90 lbs per hand) which is a very different price point.

    Price: ~$350–$400 (watch for sales — Bowflex runs discounts regularly)

    2. PowerBlock Elite EXP — Best for serious trainees

    PowerBlock is the alternative for people who find the Bowflex ceiling limiting. The Elite EXP starts at 5–50 lbs and is expandable to 70 lbs or 90 lbs per hand via add-on kits you purchase separately. The selector pin system is fast — slide the pin to your weight, pull the dumbbell out. About 2 seconds once you’ve done it a few times.

    The honest thing to say about PowerBlock is that it doesn’t feel like a traditional dumbbell. The unused weight plates form a cage around the handle — because they stay in the tray as part of the block structure. Some people adapt to this immediately. Others never fully get comfortable with it, especially for movements where the dumbbell shape matters (like lateral raises where the heel of the dumbbell needs to clear your hip).

    If you’re going to need more than 52.5 lbs within 18 months of training, start with PowerBlock and buy the expansion kit later rather than buying Bowflex now and replacing it in two years.

    Price: ~$350–$430 (base set)

    3. NUOBell 580 — Best for fast weight changes

    The NUOBell uses a twist-dial system at the center of the handle rather than at the ends. One motion — rotate, lift. The fastest mechanism I’ve used in terms of muscle memory once you’re used to it. Available in sets up to 80 lbs per hand.

    It’s a premium product at a premium price (~$600–$700 for the pair), and it shows in the materials and build quality. The dumbbell feels solid and the weight is well-distributed. The downside: it’s expensive, and the center-dial position can feel different from traditional dumbbell handling until you adapt.

    Recommended if: speed matters in your training style, you want a higher weight ceiling, and the budget exists.

    4. Flybird Adjustable Dumbbells — Best budget pick

    At ~$120–$160 for the pair, Flybird is the right choice if budget is a real constraint. Quick-adjust pin system, available in 25 lb and 55 lb versions. The build quality isn’t Bowflex — the tray and mechanism feel lighter — but the actual weights are solid and the adjustment works reliably under normal use conditions.

    I’d say: buy Flybird if you’re genuinely budget-constrained and will outgrow it in a few years, knowing you’ll upgrade. Don’t buy it as a permanent solution if your budget could stretch to something better.

    Side-by-side comparison

    ModelWeight rangeMechanismExpandablePrice (pair)
    Bowflex 5525–52.5 lbsDialNo~$380
    PowerBlock Elite EXP5–50 lbs (+kits)PinYes (to 90 lb)~$400
    NUOBell 5805–80 lbsCenter dialNo~$650
    Flybird 55 lb5–55 lbsPinNo~$150

    Which one is right for you

    Buy Bowflex 552 if you’re a beginner or intermediate trainer, want something that feels like a traditional dumbbell, and 52.5 lbs will be sufficient for the next 2+ years of your training.

    Buy PowerBlock Elite EXP if you already train and know you’ll progress past 50 lbs on compound movements, want expandability without buying a whole new set, or do circuit training where fast weight changes matter.

    Buy NUOBell if you want the best build quality and fastest adjustments and can absorb the cost.

    Buy Flybird if your budget is tight and you want something that works now while you save up for an upgrade.

    Whatever you end up buying, pair it with the right programming. The full body dumbbell workout is a good starting point for putting any of these to use. And if you’re comparing adjustable vs fixed weight dumbbells entirely, the adjustable vs fixed comparison settles that question in full.

    Frequently Asked Questions

    Are adjustable dumbbells worth it for a home gym?

    Yes — for most home gym setups, adjustable dumbbells are the single best equipment investment per square foot. One pair replaces 10–15 pairs of fixed dumbbells, taking up a fraction of the space. The cost of a quality adjustable set is less than buying a full fixed dumbbell rack covering the same weight range.

    Can you drop adjustable dumbbells?

    No — every major adjustable dumbbell brand voids the warranty if the dumbbells are dropped. The selector mechanisms aren’t built to absorb impact loading. Always set them down with control. This is a genuine training consideration for anyone who typically trains to muscular failure on pressing movements where dropping might otherwise be necessary.

    Bowflex vs PowerBlock — which is better?

    Bowflex SelectTech 552 is better for most beginners and intermediates — it feels more like a traditional dumbbell and is excellent up to 52.5 lbs. PowerBlock Elite EXP is better for experienced trainees who need more weight capacity, want expandability, and don’t mind the block-style form factor. Full comparison: Bowflex vs PowerBlock.

  • How to Start a Home Gym in 2026: The Complete No-BS Guide

    How to Start a Home Gym in 2026: The Complete No-BS Guide

    My first home gym was a $40 set of resistance bands and a pull-up bar I jammed into a doorframe that wasn’t quite wide enough. It worked. Not perfectly — the bar left marks on the trim and I nearly launched myself into the hallway more than once — but it worked.

    That was eleven years ago. Since then I’ve helped well over 300 clients build home gyms across every imaginable situation: studios, garages, basements with low ceilings, spare bedrooms that had to pull double duty as guest rooms. I’ve seen what works. I’ve seen what people regret buying. And I’ve noticed the same mistakes come up time and time again.

    This guide is everything I know about starting a home gym in 2026 — without wasting money, without buying things you won’t use, and without needing a spare $5,000 lying around.

    Is a home gym actually worth it in 2026?

    Depends who you ask — but for most people, yes. Decisively.

    The average commercial gym membership in the US runs $40–$80 per month. That’s $480–$960 every year, indefinitely. A properly built home gym, even a mid-range one, pays for itself inside 18 months and trains you for free after that. The math is fairly simple.

    What’s less obvious is the time argument. Studies consistently show that the #1 reason people skip workouts isn’t motivation — it’s logistics. Commute time, parking, waiting for equipment, finding a clean changing room. When your gym is 20 feet from your kitchen, those friction points disappear. And fewer friction points means more sessions per week, which means better results. It’s not complicated.

    The equipment market has also genuinely improved. Adjustable dumbbells are more compact and reliable than they were five years ago. Foldable power racks actually fold now. Resistance bands don’t snap as quickly as the cheap ones used to. You have more quality options at more price points than any generation of home gym builders before you.

    One honest caveat: if you thrive on the social energy of a commercial gym, the classes, the community — a home gym won’t replicate that. Know yourself before you invest.

    Step 1 — Figure out your space first

    I cannot stress this enough. Buy equipment before you measure your space and you will almost certainly regret at least one purchase.

    Grab a tape measure. Write down the actual dimensions. Don’t estimate — measure. Height counts too, especially if you’re considering overhead pressing or a pull-up station.

    Available spaceRealistic equipmentWhat won’t fit
    Under 50 sq ftBands, dumbbells, mat, doorframe pull-up barRacks, benches, cardio machines
    50–100 sq ftAdjustable dumbbells, bench, bands, compact foldable rackFull power rack, treadmill
    100–150 sq ftPower rack, barbell, bench, one cardio machineMultiple cardio pieces
    150+ sq ftAlmost anything

    Working with under 100 square feet? Don’t assume that means a bad gym. Some of my clients’ most-used setups are tight spaces with smart, space-efficient choices. Check out the small apartment home gym guide for specific layouts that actually work.

    One thing nobody mentions in these guides: ventilation. Training in a closed, unventilated room is genuinely unpleasant and can get dangerous in summer heat. Before you commit to a space, check that you can get airflow — a window that opens, a fan mount point, or an external door. Garages especially need this consideration.

    Step 2 — Pick your budget tier honestly

    Here’s what I’ve learned about budgets after over a decade of this: people usually know what they can actually spend. The problem is they get talked up or talked into aspirational setups they can’t realistically afford yet. So be honest with yourself about the number, then work within it.

    Starter tier: $150–$300

    This is not a compromise gym. It’s a starting gym. You can get genuinely fit in here.

    • Resistance bands (loop set + tube set with handles) — $30–$50
    • Adjustable dumbbells or fixed pair at your working weight — $60–$150
    • Quality exercise mat — $25–$45
    • Doorframe pull-up bar — $25–$40

    Total: roughly $140–$285. That covers pulling, pushing, hinging, squatting, and core. Every major movement pattern. Full article on the best home gym setup under $300 if you want the specific product picks.

    Mid-range tier: $500–$1,000

    This is where I’d put most people with a serious interest in long-term training. Adjustable dumbbells that grow with you, a proper bench, better flooring, a band set that includes heavy options. You’re not compromising on anything at this level.

    Serious tier: $1,500–$3,000+

    Power rack, barbell, plates, bench, cardio piece of some kind. At this point you’re building something that could genuinely replace a commercial gym for most training goals. The adjustable dumbbell guide covers which sets are worth the investment at this tier.

    Step 3 — Match equipment to your goals

    This is the step most guides skip. Equipment choice should follow training goal, not the other way around. People buy what looks impressive, then try to build a program around it. Backwards.

    Ask yourself: what are you actually trying to achieve? Fat loss? Muscle building? General fitness and endurance? Sport-specific conditioning? Mobility and injury prevention? The answer genuinely changes what you should buy first.

    • Fat loss + conditioning — resistance bands, adjustable dumbbells, jump rope. You don’t need heavy weights to lose fat. You need training frequency and a calorie deficit.
    • Muscle building — adjustable dumbbells or barbell + plates, bench, pull-up station. Progressive overload requires progressively heavier loads over time. Plan for that ceiling before you buy.
    • General fitness — dumbbells, bands, mat, pull-up bar. The classic combo. Covers everything without specialising in anything.
    • Cardio focus — a quality treadmill, stationary bike, or rowing machine as the anchor piece, supplemented by bands and a mat. Check our foldable treadmill guide if space is tight.

    Step 4 — The equipment that actually matters

    I’m going to be direct here. The fitness equipment industry makes money by convincing you that more equipment equals better results. It usually doesn’t. What matters is the right equipment — used consistently, over time.

    The non-negotiables for almost everyone

    Adjustable dumbbells. The most versatile piece of home gym equipment per square foot in existence. Curl them, press them, row them, goblet squat them. One set covers 80% of exercises. See the full adjustable dumbbell guide for what to buy.

    Resistance bands. Underestimated by beginners, loved by experienced trainers. They add variety, assist pull-up progressions, and work muscle groups dumbbells miss at certain angles. The resistance band buying guide breaks down the three types and what each does.

    A quality exercise mat. Not a yoga mat from a discount store. Something 6mm thick with real grip. You’ll use it for stretching, floor work, core exercises, and as a protective layer under equipment. The best yoga mats guide has tested picks at every price point.

    Pull-up bar. Upper back and bicep development without it is genuinely harder. A doorframe bar costs $25–$40 and lasts years. Worth every penny.

    Things that sound essential but usually aren’t (yet)

    A bench — useful but not essential to start. You can floor press. A power rack — only necessary if you’re barbell squatting or benching alone with heavy weight. A cardio machine — if you’re not specifically training for cardiovascular endurance, the money is usually better spent elsewhere first.

    Step 5 — Setting it up so you actually use it

    Here’s something they don’t tell you: gym psychology is real. The way a space looks and feels has a measurable effect on how often you show up to train in it.

    Good lighting matters. Overhead fluorescents in a cold garage feel like punishment. A couple of LED strips or a bright floor lamp changes the atmosphere entirely. Keep the space dedicated — don’t let it become general storage with a dumbbell in the corner. When you walk in, it should feel like a gym, not a spare room with fitness equipment in it.

    Have your equipment visible and accessible. If your dumbbells are buried behind boxes, you’ll skip the workout. Set up a basic dumbbell storage stand or even a shelf. Make it easy to grab and go.

    Temperature. If you’re in a garage, a basic space heater for winter and a fan for summer is $60 well spent. You won’t train consistently if the environment makes training miserable.

    Mistakes I see constantly

    Buying too much too fast. Enthusiasm is high at the start. People spend $2,000 in week one and train for six weeks. Buy the minimum viable setup first, use it consistently for three months, then add equipment based on what you’re actually missing.

    Choosing equipment that doesn’t match their training style. If you hate steady-state cardio, a treadmill will collect laundry. Know yourself.

    Ignoring the floor. Training on bare concrete is rough on joints and genuinely uncomfortable. Rubber tiles or horse stall mats are cheap and transformative. Budget $60–$150 for flooring before anything else.

    Buying cheap resistance bands. The $8 bands you find on discount sites snap. They always snap. Mid-session. Often at full stretch. It’s startling and occasionally painful. Spend $15–$25 on a quality set and inspect them before every session.

    Not measuring ceiling height. If you’re over 6 feet tall and your ceiling is 7.5 feet, overhead pressing is uncomfortable and pull-ups might not be possible depending on the bar mounting. Measure before buying.

    Frequently Asked Questions

    How much does it cost to start a home gym?

    A functional starter home gym — resistance bands, adjustable dumbbells, a mat, and a pull-up bar — can be built for $150–$300. A mid-range setup with quality adjustable dumbbells, a bench, and proper flooring runs $500–$1,000. A serious setup with a rack, barbell, and cardio piece is $1,500–$3,000+. You don’t need the most expensive tier to get excellent results.

    What is the most important piece of home gym equipment to buy first?

    Adjustable dumbbells. They cover the widest range of exercises across all muscle groups, scale with your strength over time, and replace an entire rack of fixed weights in a compact unit. If you can only buy one thing, buy adjustable dumbbells and supplement with resistance bands.

    How much space do I need for a home gym?

    The minimum usable space is roughly 6×4 feet — enough to lie down, extend your arms, and perform floor-based exercises. A functional dumbbell and band setup works in 50 square feet. 100+ square feet opens up benches and compact racks. You can build an effective gym in a spare bedroom, but measure before you buy anything.

    Is a home gym better than a gym membership?

    For most people who train consistently, yes — financially and logistically. A home gym pays for itself within 12–18 months versus ongoing membership costs, eliminates commute time, and removes scheduling friction. The exception is people who rely on the social environment of a gym for motivation, or those who need specialist equipment (olympic lifting platforms, climbing walls, pools) that can’t be replicated at home.